Pros
- Easy assembly
- Large work area
- Fastest engraving speeds in industry (900 mm/s)
- Autofocus and infrared positioning
- Resume Engrave feature minimizes waste
Cons
- Incompatible with M1 & M2 chip Mac devices
- Directions lack critical information for setup
- Required LightBurn software not free to use
As more people turn to DIY projects for their homes or to sell online as a side hustle, laser engravers have become one of those must-have gadgets. However, not all laser engravers are built the same, and you want to invest in something that is going to perform well and last for thousands of projects. iKier claims their laser engravers are some of the best in the industry, with the K1 Pro Max being their top-of-the-line model with many standout features. But is this massive engraver and cutter worth its sticker price of $1999.99? I tested it to find out.
This is a sponsored article and was made possible by iKier. The actual contents and opinions are the sole views of the author, who maintains editorial independence, even when a post is sponsored.
Unpacking and Assembly
The iKier K1 Pro Max Laser Engraver and Cutter is one of the largest laser engraving tools I’ve seen. Measuring at 29.92 x 25.59 x 8.65 inches and weighing nearly 35 pounds, it’s a fairly serious piece of equipment. Its metal frame design and wrapped cords demonstrate durability, meaning the machine is made to last. It is also designed with precision and agility in mind, which is great for those who want to engrave or cut elaborate designs.

Unlike many other comparable devices, the iKier K1 Pro Max comes with the majority of the frame already preassembled. You just have to attach the final few pieces (including the laser) and connect all the wires to get up and running. iKier includes all of the necessary screws and cables to finish assembly, along with some minimally informative assembly directions. I didn’t find the directions particularly helpful, and the included QR code for video directions does not include specifics for the K1 Pro Max.

Overall, I feel like the device is well-built and sturdy once assembled. As it’s so large and heavy, I do recommend putting it together in whatever space you are dedicating to storing and using the K1 Pro Max. It can be moved without disassembling it if you need to, but you will need to be careful not to break any of the wires or drop it in a way that could mess up the mechanics.
Connecting to a Computer
I was excited to power on the iKier K1 Pro Max and begin performing some test projects. Based on minimal directions and a couple video reviews I watched prior to demoing the unit, I assumed it would be a fairly straightforward process. Download LightBurn to your Windows or Mac computer, connect the K1 Pro Max to your computer with the provided USB cable, and follow the instructions on the screen.

However, I encountered several problems when I actually started the process.
First, I tried using my MacBook Air, as it’s newer than my PC. I used the provided USB-C cable and tried the recommended steps in LightBurn. Unfortunately, I could never get the K1 to appear under available devices. After lots of troubleshooting and some additional research, I learned that many other users had encountered problems when trying to use iKier products with Apple computers running Apple silicon, and my MacBook has an M1 chip. So, I gave up and moved on to my Windows device.
Once again, I downloaded LightBurn, turned on the engraver, and connected it to my PC using the provided USB cable. When I followed the steps, though, I could not get the device to show. After trying both the USB-C and USB-A cables and trying several different recommendations online, I finally decided to use one of my own USB cables. Finally, I got the engraver to show as an available device.

Note: LightBurn does require a paid subscription after the free trial expires. You w’t be able to use your K1 Pro Max unless you pay for the software.
Set up the laser once you have your device connected. iKier includes infrared positioning and autofocus, so you can have the machine calibrate itself to ensure an accurate engrave or cut. Perform this from LightBurn or by using the included screen attached to the K1 Pro Max.

Engraving or Cutting
After you download LightBurn and connect your K1 Pro Max, you’re ready to start designing your project. However, unlike other laser engravers, this device offers a variety of options.
One of the standout features of the iKier K1 Pro Max is its ability to swap between engraving and cutting mode. To do this, toggle the switch on the laser. Setting it to 24W for engraving will ensure precision and quality engraving, while toggling to 48W will provide the power needed to cut through one-inch (25 mm) thick wood, 0.75 inches (19 mm) of 19mm black acrylic, and 0.01 inch (0.3mm) of stainless steel.
Since I was using the engraver indoors at my dining table, I decided to first test the engraving feature to avoid damage to my table.
From the app’s main screen, the left side has a menu with most of the tools you need to construct a design, while the right side has two boxes: one for the design layers and their settings and another for controlling the laser. The middle is your design space, which allows you to change the dimensions and set an accurate space based on the size of the materials, up to the K1 Pro Max’s maximum work space of 16 x 16 inches (410mm x 410mm).

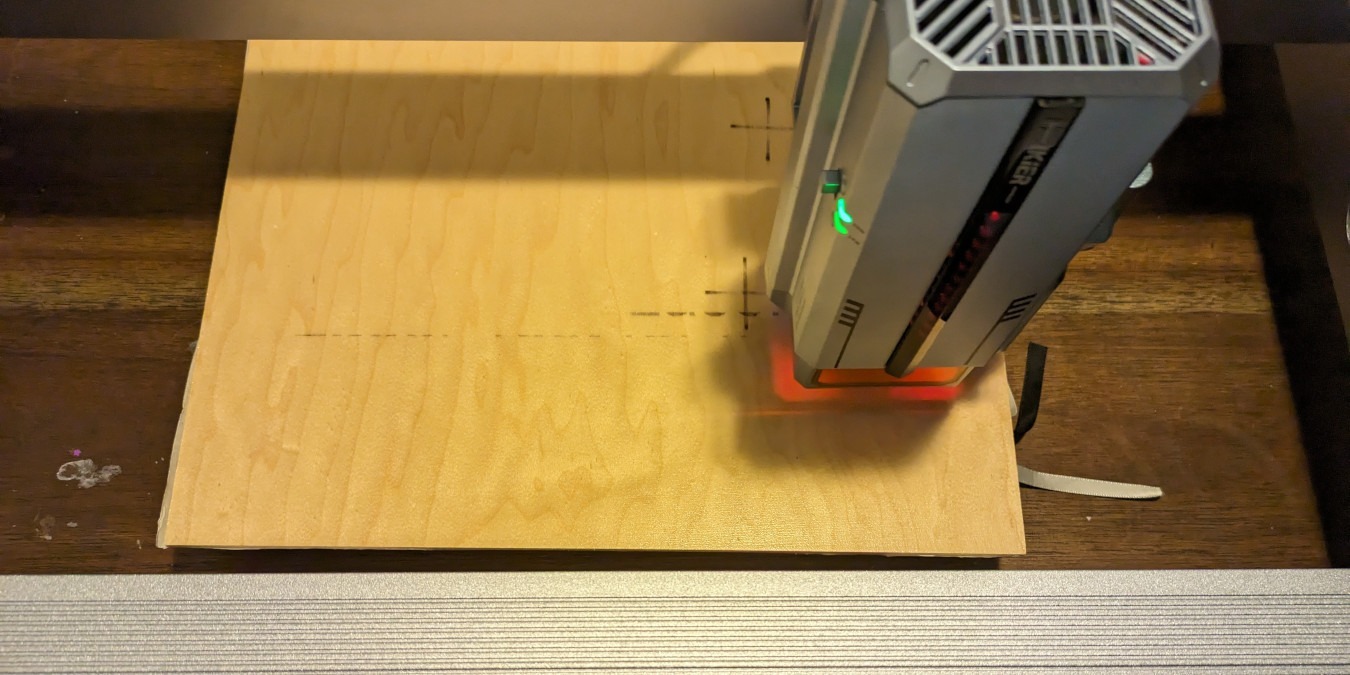
For this test, I did some simple text on a wood plank. I threw together the design, then tried to print.
A few things I learned during this process that aren’t specified in the directions:
- You must make sure the distance between the laser and the surface you are engraving is 5mm. If the space is greater than this, you will receive an error message when you begin engraving.
- Although the laser is capable of speeds up to 900 mm per second, this may not be the best idea for certain designs or materials. Consult the Parameter Settings Tables via the online user manual to verify settings for a project.
- Make sure you check the placement of your material surface before starting. The machine will not perform any type of “check” for you.

Overall, the iKier K1 Pro Max performs well once starting a project. I found that it did my small text test fairly quickly, with no major issues (minus me not having the material surface placed quite right at first). However, if you do run into issues, the machine offers a Resume Engraving feature, which lets you pick back up where you left off in the event of a system crash or power outage. This ensures that you don’t waste materials or end up with a half-finished project.

Summary
Overall, my testing showed the iKier K1 Pro Max Laser Engraver and Cutter is a decent machine with a quality design. You definitely should study first if you are new to laser engravers, as it’s not designed for “plug and play.” Also, Mac users should verify whether their device will work with the tool before buying, as most people (myself included) have seen compatibility issues with newer Macs that contain M1 and M2 chips. However, those small issues aside, I feel confident that I will be able to make many incredible signs and other items now that I have the machine up and running.
The iKier K1 Pro Max Laser Engraver and Cutter is available for $1449.99.
Our latest tutorials delivered straight to your inbox