
Traceroute is a simple networking utility that can trace the route that an internet packet takes from the source to its destination host. This article will show you how you can use Traceroute to check your Linux’s network health and diagnose emerging issues.
Note: While this article highlights traceroute in Linux, you can also use this utility in macOS and Windows.
How Does Traceroute Work?
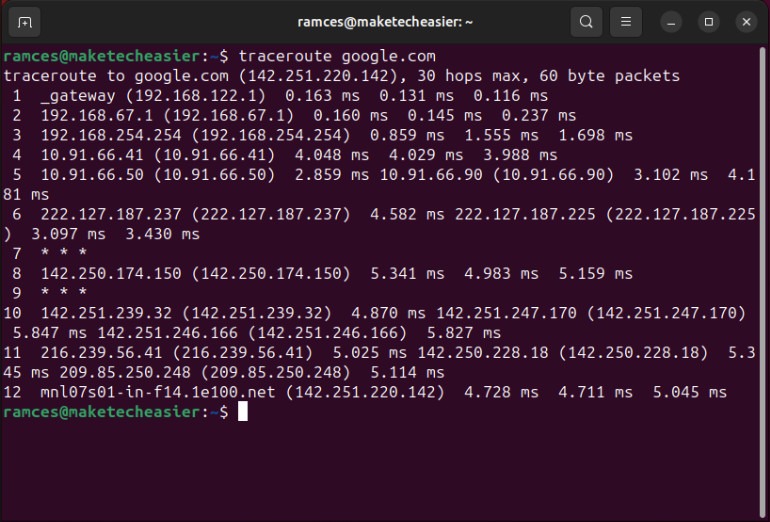
Traceroute works by sending UDP packets with short TTL lengths to every internet gateway along the path to a remote host. These short TTL lengths then force these gateways to report a ICMP “TIME_EXCEEDED” response along with their interface’s IP address.
These two factors combined to allow traceroute to create a detailed list of machines that your packet will go through as it connects to an external server. For example, running a traceroute to “google.com” in my network will list between 9 to 10 gateways before it reaches Google’s servers.
What Network Issues Can Traceroute Fix?
Traceroute is just a network probing tool and it neither optimizes nor fixes any outstanding issue in your network. Traceroute can only describe how networks and the packets that travel on them behave.
Despite that, it is still an important tool for diagnosing potential network problems. One good example is when a local gateway fails to forward a packet to its next hop. Traceroute can address this by highlighting any router inside your core network that doesn’t send a “TIME_EXCEEDED” response.
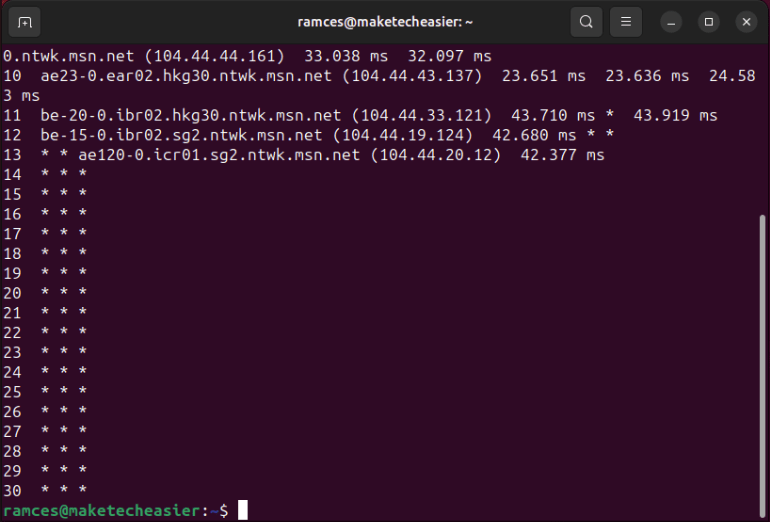
Aside from that, you can also use traceroute to check for latency issues between hosts. This can be helpful if you want to see whether your local network needs a VPN to ensure consistent low latency when connecting to a remote machine.
Good to know: Learn more about network probing by using nmap without sudo in Linux.
Using Traceroute in Linux
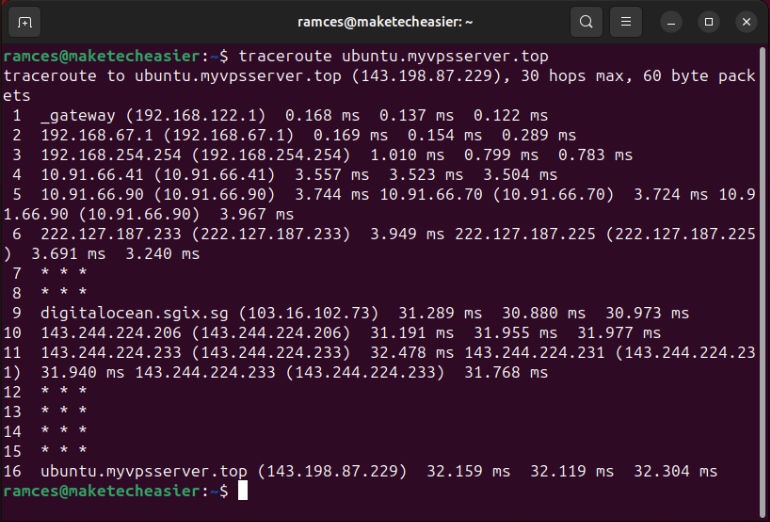
Open a new terminal and type traceroute followed by the machine address that you want your machine to connect to. This could either be a domain name or an IP address. For example:
traceroute ubuntu.myvpsserver.top
Press Enter to start mapping the path towards your remote host.
Tip: Learn how to check for your local internet gateway by finding your router’s IP address.
Sending Packets with Custom TTL in Traceroute
While using traceroute by itself is enough for basic use, you can also tweak how the program works using flags. This can be helpful especially if you are doing a triage of your network.
One of the most common tweaks in traceroute is changing the amount of packets that it sends to a gateway. To do this, use the -q flag followed by the amount of packets that you want to send per request:
traceroute -q 1 ubuntu.myvpsserver.top
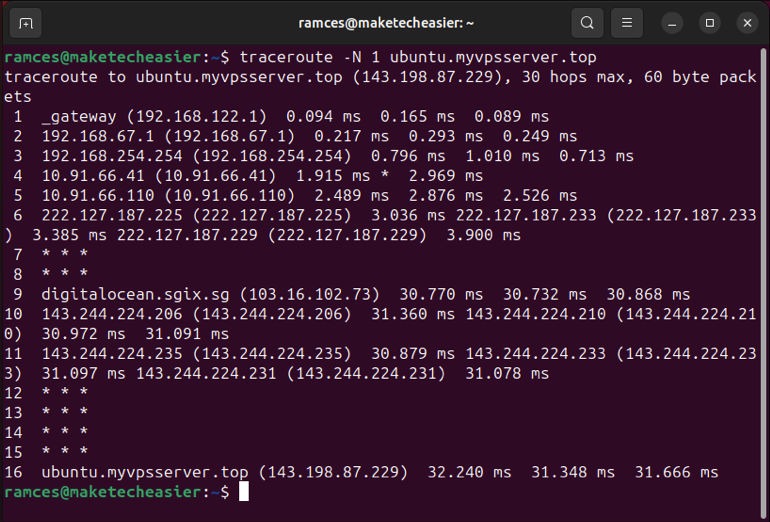
You can also use the -N flag followed by “1” to explicitly disable simultaneous packet requests. This is helpful if you have gateways that rate limit UDP packets with short TTL.
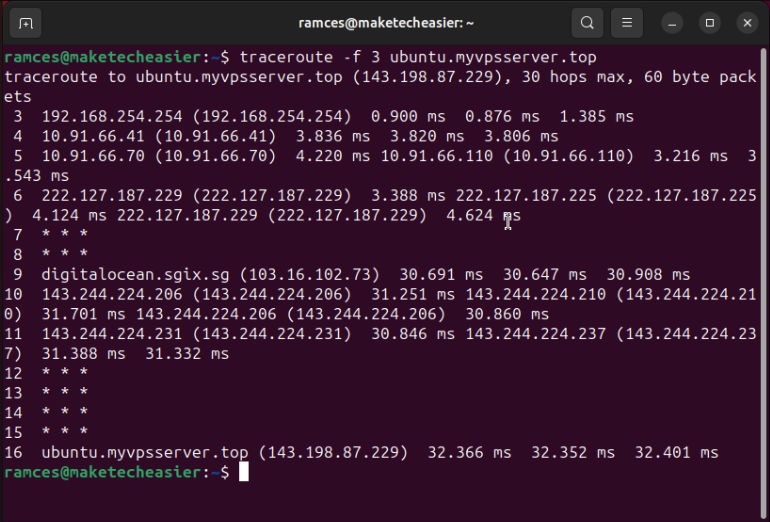
Lastly, you can also modify the default TTL value for traceroute. To do that, add the -f flag followed by the TTL that you want for your first probing packet.
Changing The Traceroute Protocol in Linux
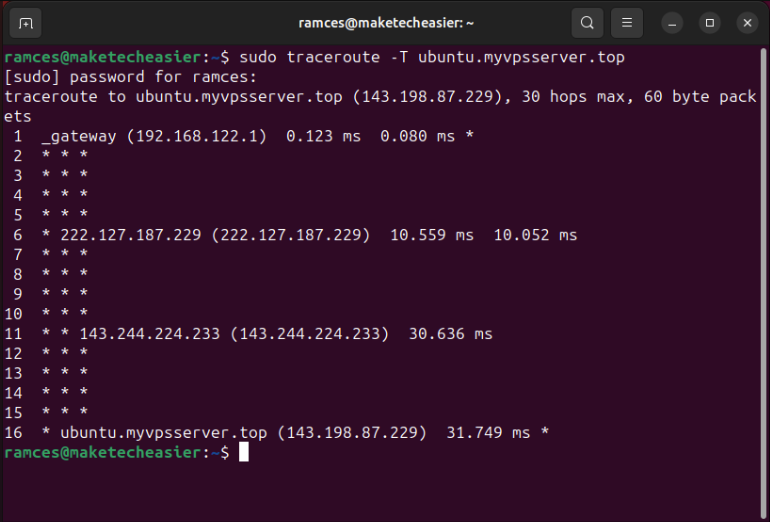
By default, traceroute in Linux uses UDP for sending probe packets to network gateways. This can be an issue if you are probing a gateway that actively blocks traceroute packets.
To fix this, you can use the -T flag to run traceroute using simple TCP SYN packets.
On the other hand, you can also force traceroute to use an ICMP ECHO packet if the destination gateway only restricts UDP:
sudo traceroute -I myvpsserver.top
Modifying the Interface and Port in Traceroute
Traceroute also supports custom network interfaces. This is where traceroute will use a different network card in your machine to probe a packet’s path.
To do that, run the program with the -i flag followed by the device name of your interface.
traceroute -i enp1s0 myvpsserver.topNote: You can find the available network interfaces for your machine by running ifconfig -s | awk '{print $1}'.
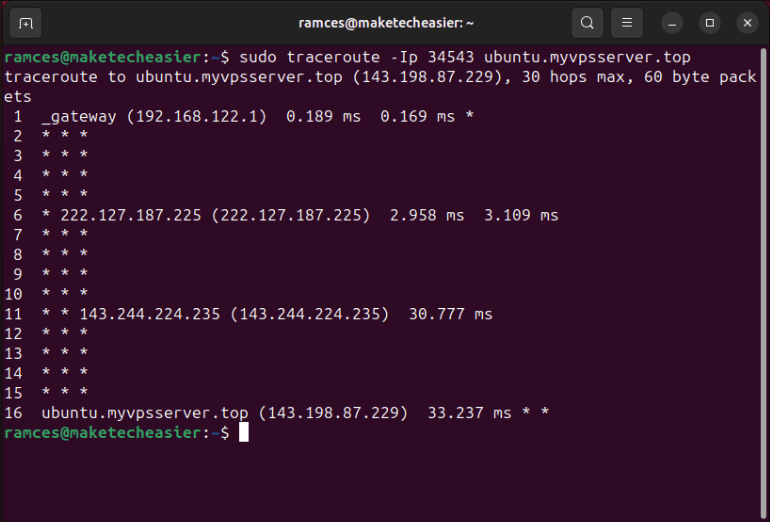
Aside from that, you can use the -p flag to specify the starting port number that traceroute will use for UDP probing:
traceroute -p 34543 myvpsserver.top
Lastly, the -p flag also changes its behavior depending on the protocol that you are using. Pairing it with -I will set the -p value as the initial ICMP sequence number instead of the destination port.
Learning how to use traceroute is just the first step in understanding how computers communicate with each other over a network. Learn more about computer networking by analyzing the contents of a TCP packet using tcpdump.
Meanwhile, you can also learn more about the higher OSI layers, such as DNS, by using the dig tool in Linux.
All alterations and screenshots by Ramces Red.
Our latest tutorials delivered straight to your inbox