
As a Gmail user, you may be looking for emails that you know you received, but just can’t seem to locate them. Whether you moved or deleted them, or the spam filter blocked your senders, these messages are easily recoverable. On the face of it, they’re just lost in your Gmail storage unless you permanently deleted them from the Trash or Spam folders. This guide discusses how to find lost emails in Gmail.
Note: beginning December 1, 2023, Google will start deleting inactive Gmail accounts. You may lose access to them permanently. To prevent this, sign in to your inactive Gmail accounts and start using them regularly.
1. Check Spam Folder
The Gmail Spam folder is the first place to check for any recently missing emails.
Click Spam in the left panel of your Gmail window, then scroll down the page to find any senders you may have put in the Spam folder unintentionally. Select the senders to unblock, click Not spam, and their emails will go back to your Inbox.
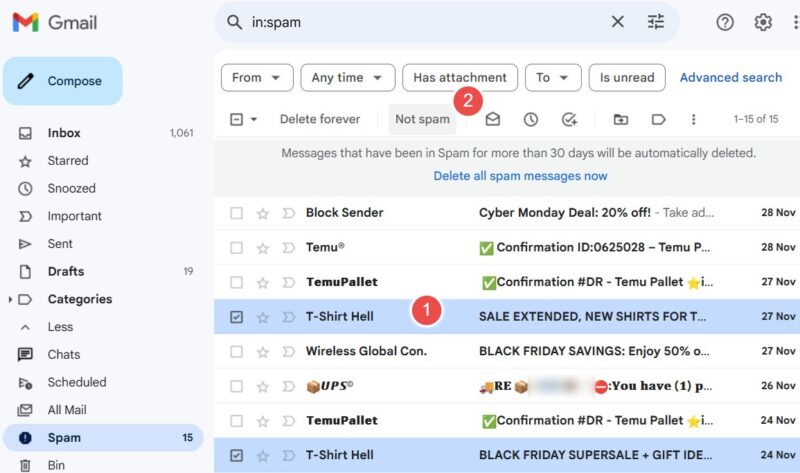
Scrolling can take a lot of time If you have too much junk email. The following method is faster if you remember the sender details.
In the Spam folder in the left column, go to the Gmail Search box at the top, and enter in:spam, followed by a search operator in the search drop-down panel. For example, if you know the sender’s email address, search for it in From. Likewise, if you remember the email delivery timeline, search for it within that time frame.
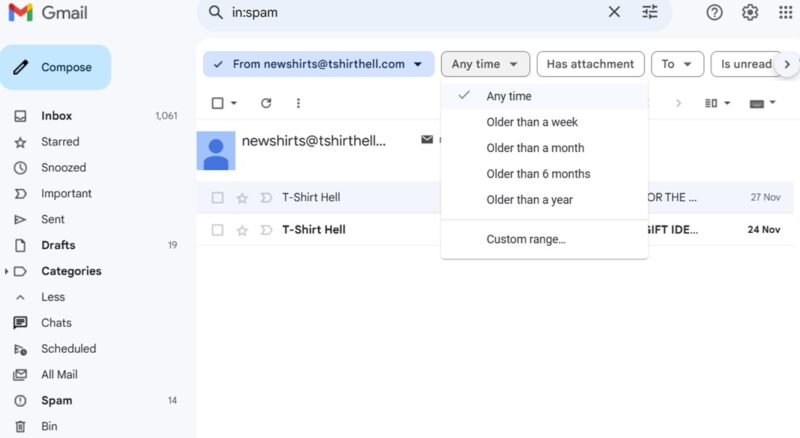
Also from the search drop-down panel, click on the Advanced search button to search using other operators, such as Subject and Includes the words.
Tip: did you get a warning message from Google about strange login attempts? If it wasn’t you, there may be hackers behind it. It’s very easy to block their attempts, as well as recover a hacked Gmail account.
2. Look in Archived Messages
If you’re using Gmail’s Archive feature to remove frequently received emails, they will never appear in the regular Inbox or Sent folders. You’ll need to unarchive them so that they can be viewed once again.
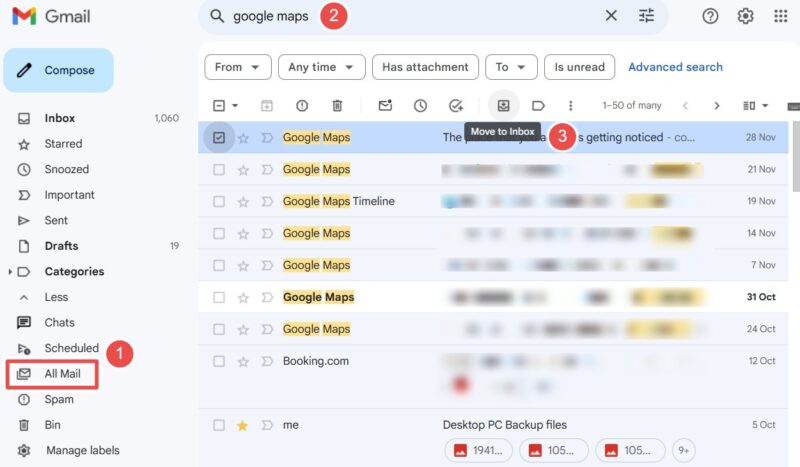
Click All Mail in the left column, which will display all your hidden messages, including the archived emails. Either scroll to find the emails, or use the search box with any keywords you remember.
Once you find the archived emails, select them one by one, and click Move to inbox at the top. This unarchives the email and sends it to the inbox.
Tip: if you don’t like to share your Gmail account on unknown websites, consider using one of these disposable and throwaway email providers.
3. Check Trash or Bin Folder
Once you delete your email in Gmail, they move to the Trash or Bin folders (named differently based on the user’s language settings). The deleted messages remain there for 30 days, then are deleted automatically.
As long as you’re within the 30-day window, you can recover the messages by clicking Trash/Bin in Gmail’s left column, then searching for them. This shows all the results in your Trash that relate to your keyword search.
If you can see the email you’re looking for, make sure to move it to your inbox to prevent it from being moved to the Trash. Remember that if you have a massive number of Trash messages to browse through, it’s faster to go to the Gmail search box and enter in:trash followed by a search operator.
Tip: you can speed up your email routines by enabling and using Gmail keyboard shortcuts.
4. Use the Gmail Search Feature
You can use the Gmail search feature to find any email hidden under Labels or other internal folders.
To begin, click the icon for Show search options, which is located to the extreme right of the search box, to open a pop-up window.
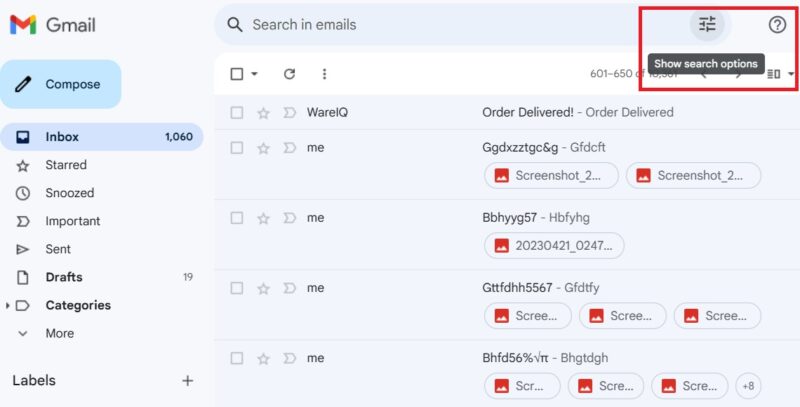
To effectively find lost emails in Gmail, you need to know some keywords contained in the email, as well as an approximate date it was sent or received. This makes it easier to narrow down the location of the email.
If you are looking for a phrase, make sure you use quotations to isolate it as a phrase as opposed to multiple words. This can make it much easier to narrow down the search results.
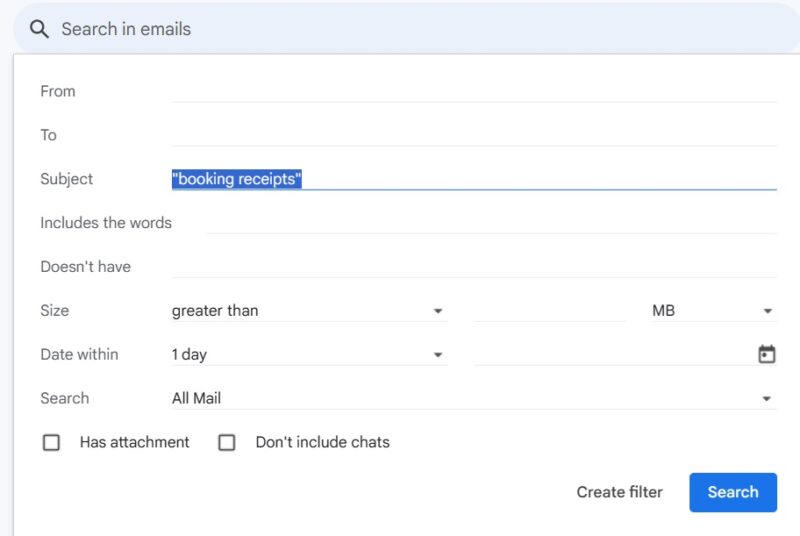
You can also use simple search operators to find lost emails within the search box.
subject:if you remember one or more words in an email’s subject line, use this operator.has:youtubewill return email messages with a YouTube video.has:attachmenthelps you list email messages with attachments.has:pdflists all the emails in descending order that contain a PDF file.
Tip: along with Gmail search operators, you can also use Google Scripts to automate your Gmail experience.
5. Use Gmail Message Recovery Tool
The Gmail Message Recovery Tool service allows you to find lost emails that were deleted due to someone else using your account.
Visit the link to see whether you can still access the emails. It can only recover emails that were deleted 30 days prior to you receiving an email from Gmail questioning suspicious emails.

But if you were the only one who used your Gmail account, you will see a message that reads: “Unfortunately, your missing emails were permanently deleted, and we can’t get them back.”
If you still can’t find the emails you’ve lost, try going through any other default folders you have set up with the steps above. If that still doesn’t work, chances are the email is gone for good and was deleted by you or Gmail at some point.
Another option to find your lost emails in Gmail is to use Google Takeout, which backs up all your Google data.
Image credit: Pixabay. All screenshots by Sayak Boral.
Our latest tutorials delivered straight to your inbox